How to Improve Your Instagram Photos: 6 Tips to Try Today
Tech Tips
 1 year ago
Smartphones these days put amazing camera features in the pockets of regular people, making it possible for anyone to take professional-looking photos.
However, even with our smartphone’s fancy camera features, not everyone is aware of some of the basic photography rules that can make your images stand out among the rest.
Want to make your Instagram photos and entire feed stand out? Follow these six simple tips to improve your images!
6 Tips to Improve Your Instagram Photos
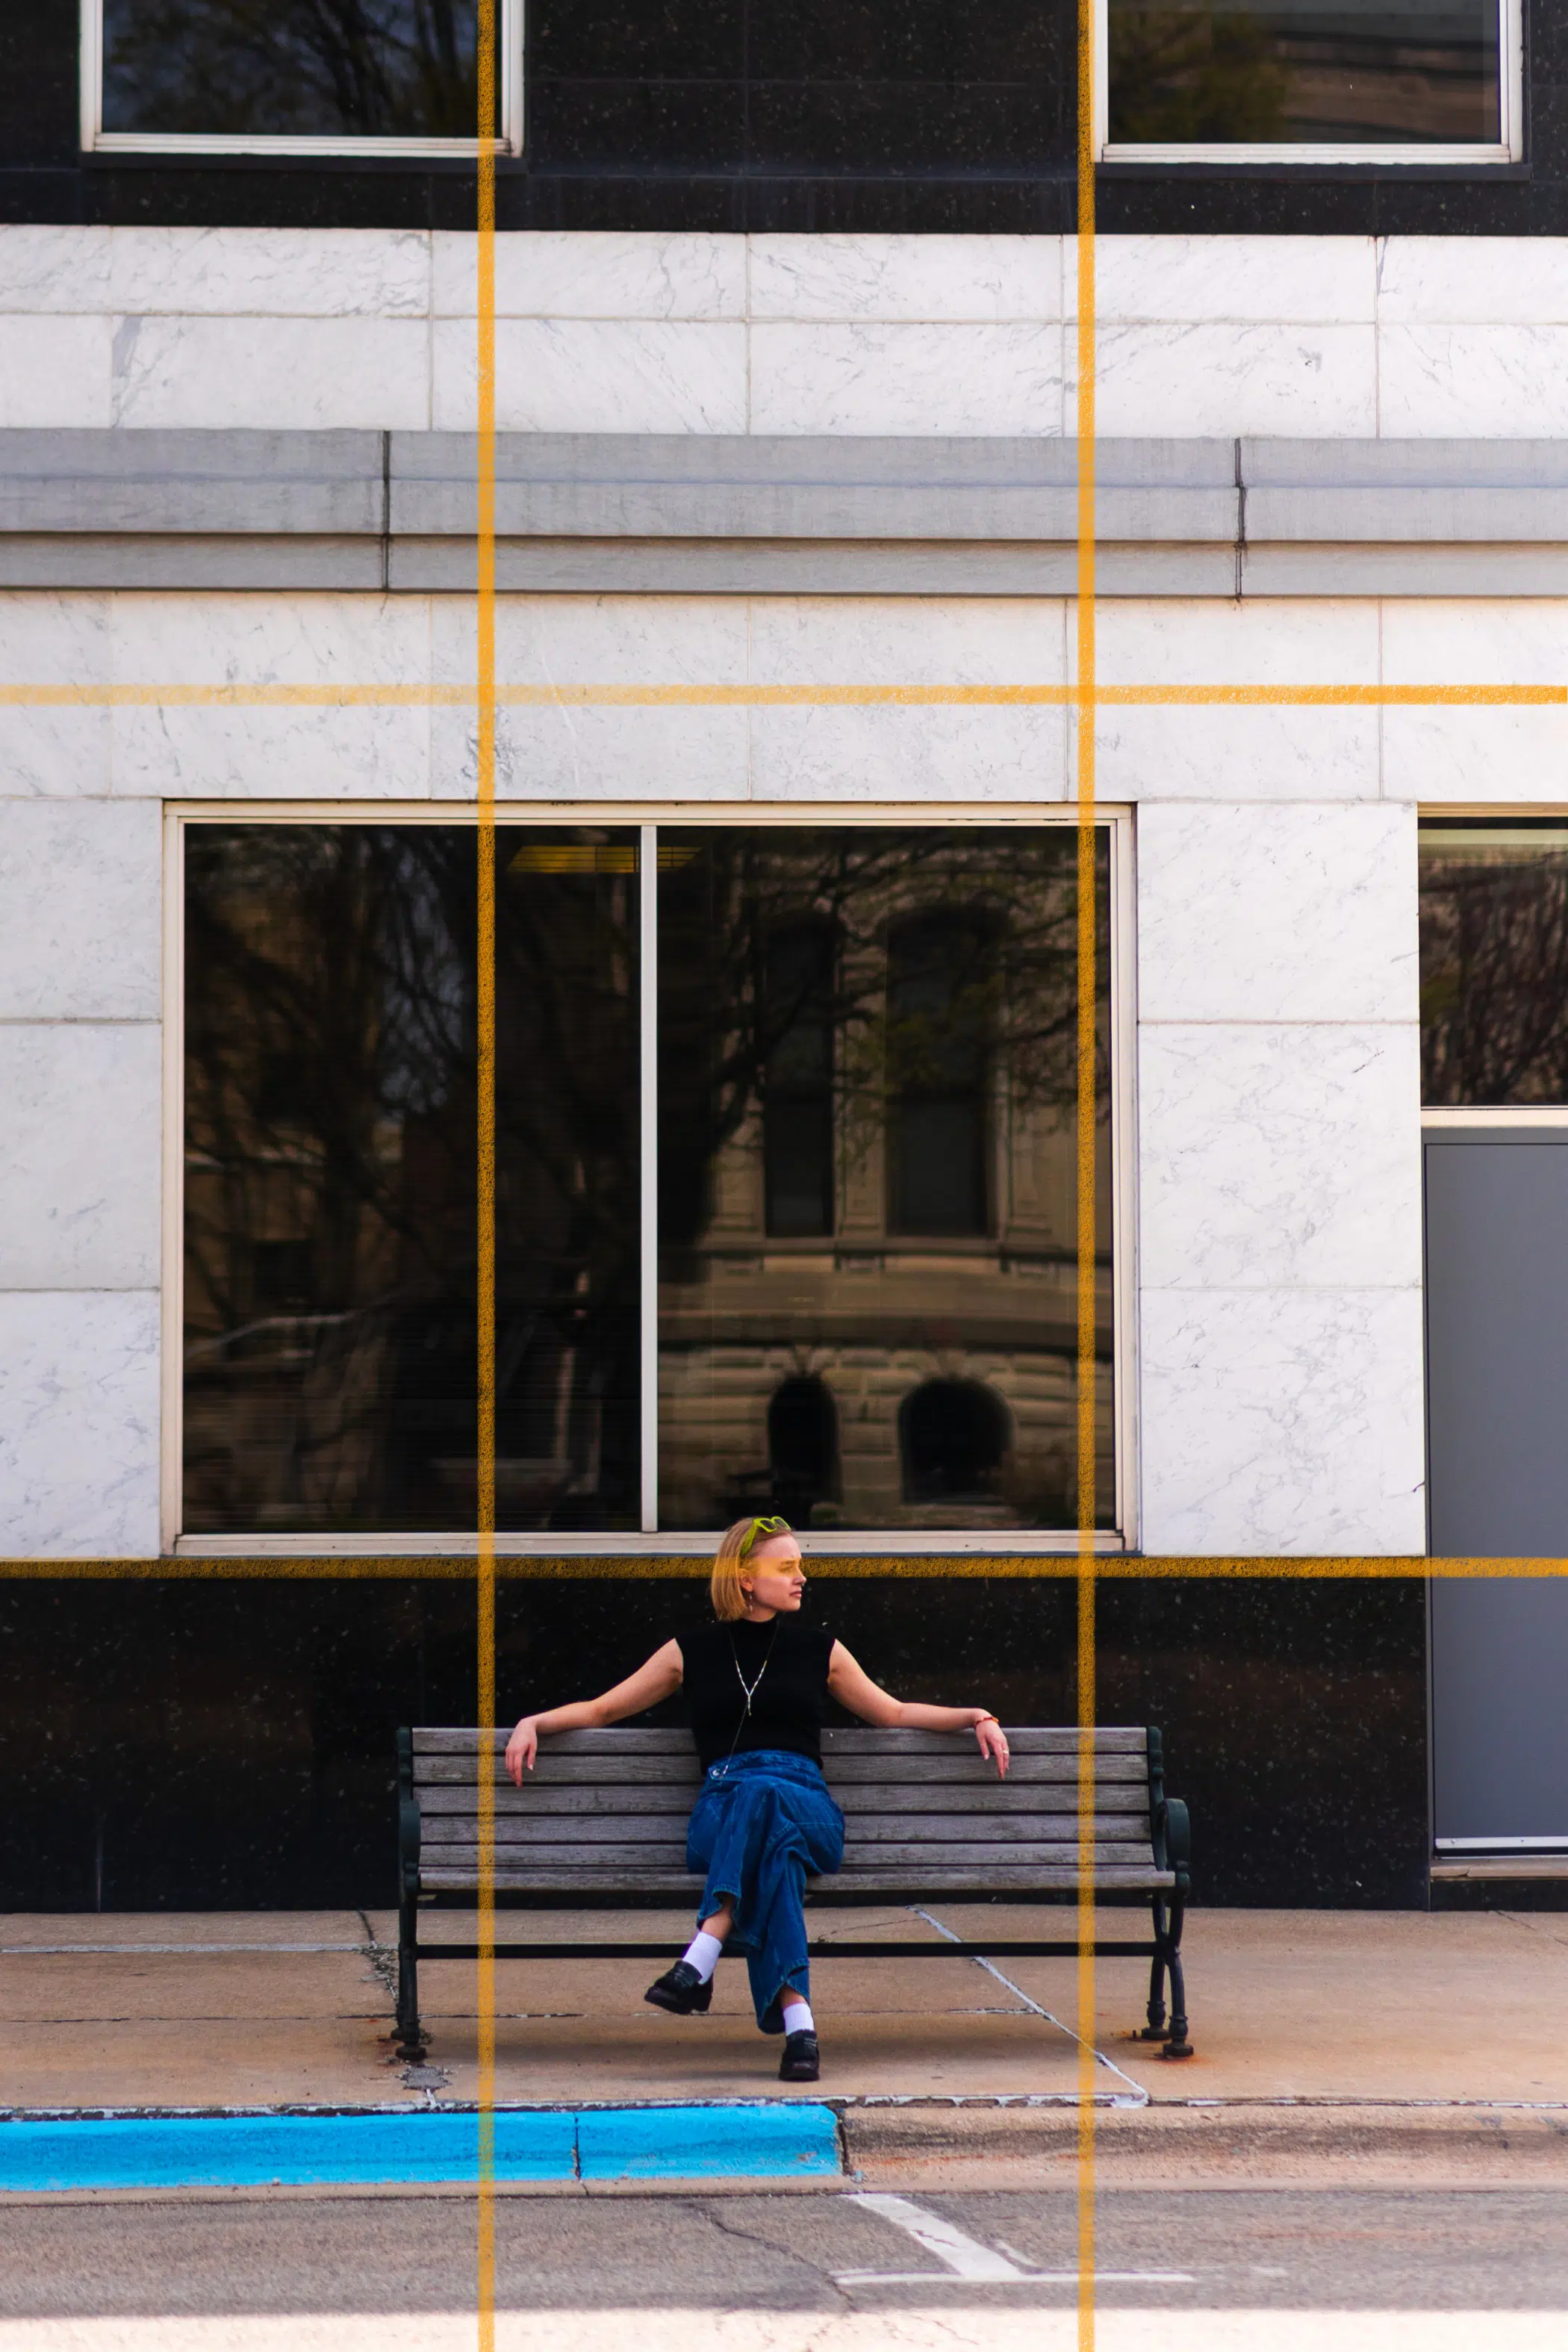
#1 Use the Rule of Thirds
The rule of thirds (or the golden ratio) is a photography principle designed to guide you to create a balanced composition. To follow the rule of thirds, take these steps:
- Divide your frame with three evenly-spaced lines going across horizontally and three evenly-spaced lines going up and down vertically. (Your phone might even have a feature that allows you to add gridlines into your frame while taking the photo.)
- When you take the shot, place the subject of your photo on the horizon lines on the upper or lower thirds of your frame.
- If you’ve already taken your photo, you can apply the rule of thirds to how you crop your image in editing.
Did you know? The golden ratio was first recognized by the ancient Greeks, who discovered that the ratio creates visually pleasing proportions. It’s since been used in art, math, and architecture!
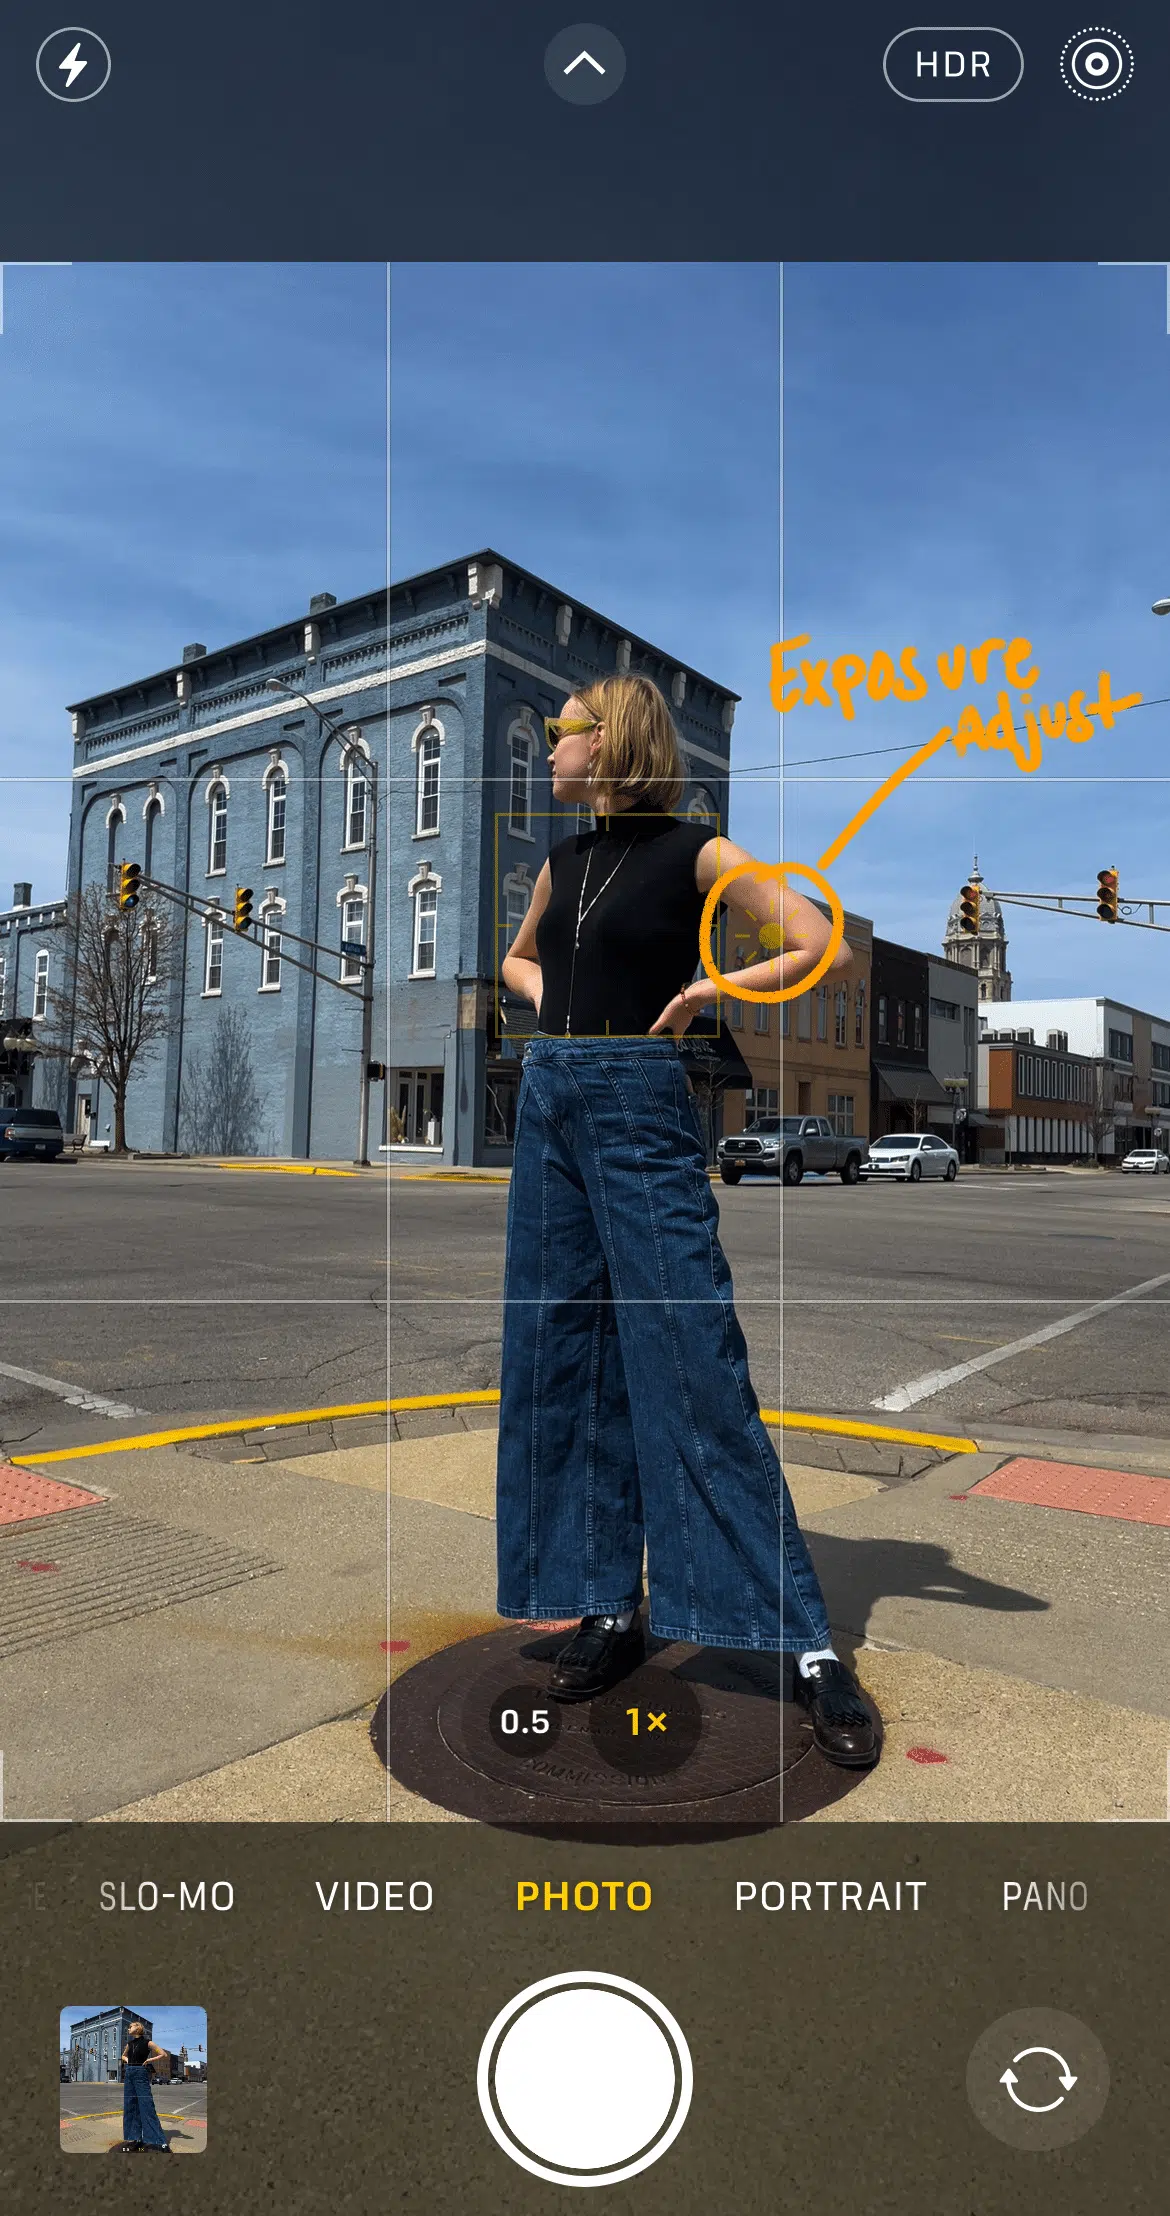
#2 Check Your Exposure
When you tap on the screen in your smartphone camera app, a square will pop up on the screen that helps you set focus and exposure. From there, there are a couple of things you can do to adjust the focus and exposure:
- Tap the square and swipe up or down to adjust how light or dark the spot on the image is. This is particularly helpful if you are shooting against a bright background.
- Lock focus and exposure to a specific point by pressing and holding on to the area of the photo where you want to add light exposure.
- If you’re using an Android phone, you can adjust exposure by going into the “Pro” mode in their camera app, which will allow you to adjust ISO (light sensor sensitivity) and shutter speed.
#3 Maximize Your Lighting
Lighting can make or break your image. Have you ever seen a photo of what appeared to be shadows against a bright background? Or wondered why people in an image looked washed out or dull? These are common mistakes that can be fixed with a little awareness of how to maximize your lighting.
Here are some do’s and don’ts when it comes to lighting:
Lighting Don’ts
Don’t shoot photos with a large light source behind your subject. This will result in backlit photos or over-exposed backgrounds.
Don’t use direct light on your subject. Generally, your subject will look better under diffused light. Bright sunny days often create images with stark shadows.
Lighting Do’s
Do take advantage of diffused, soft light. One of the biggest reasons photographers like to shoot in the golden hour (the period of time right after sunrise or right before sunset) is because it is the prime time to capture the perfect shot in diffused light.
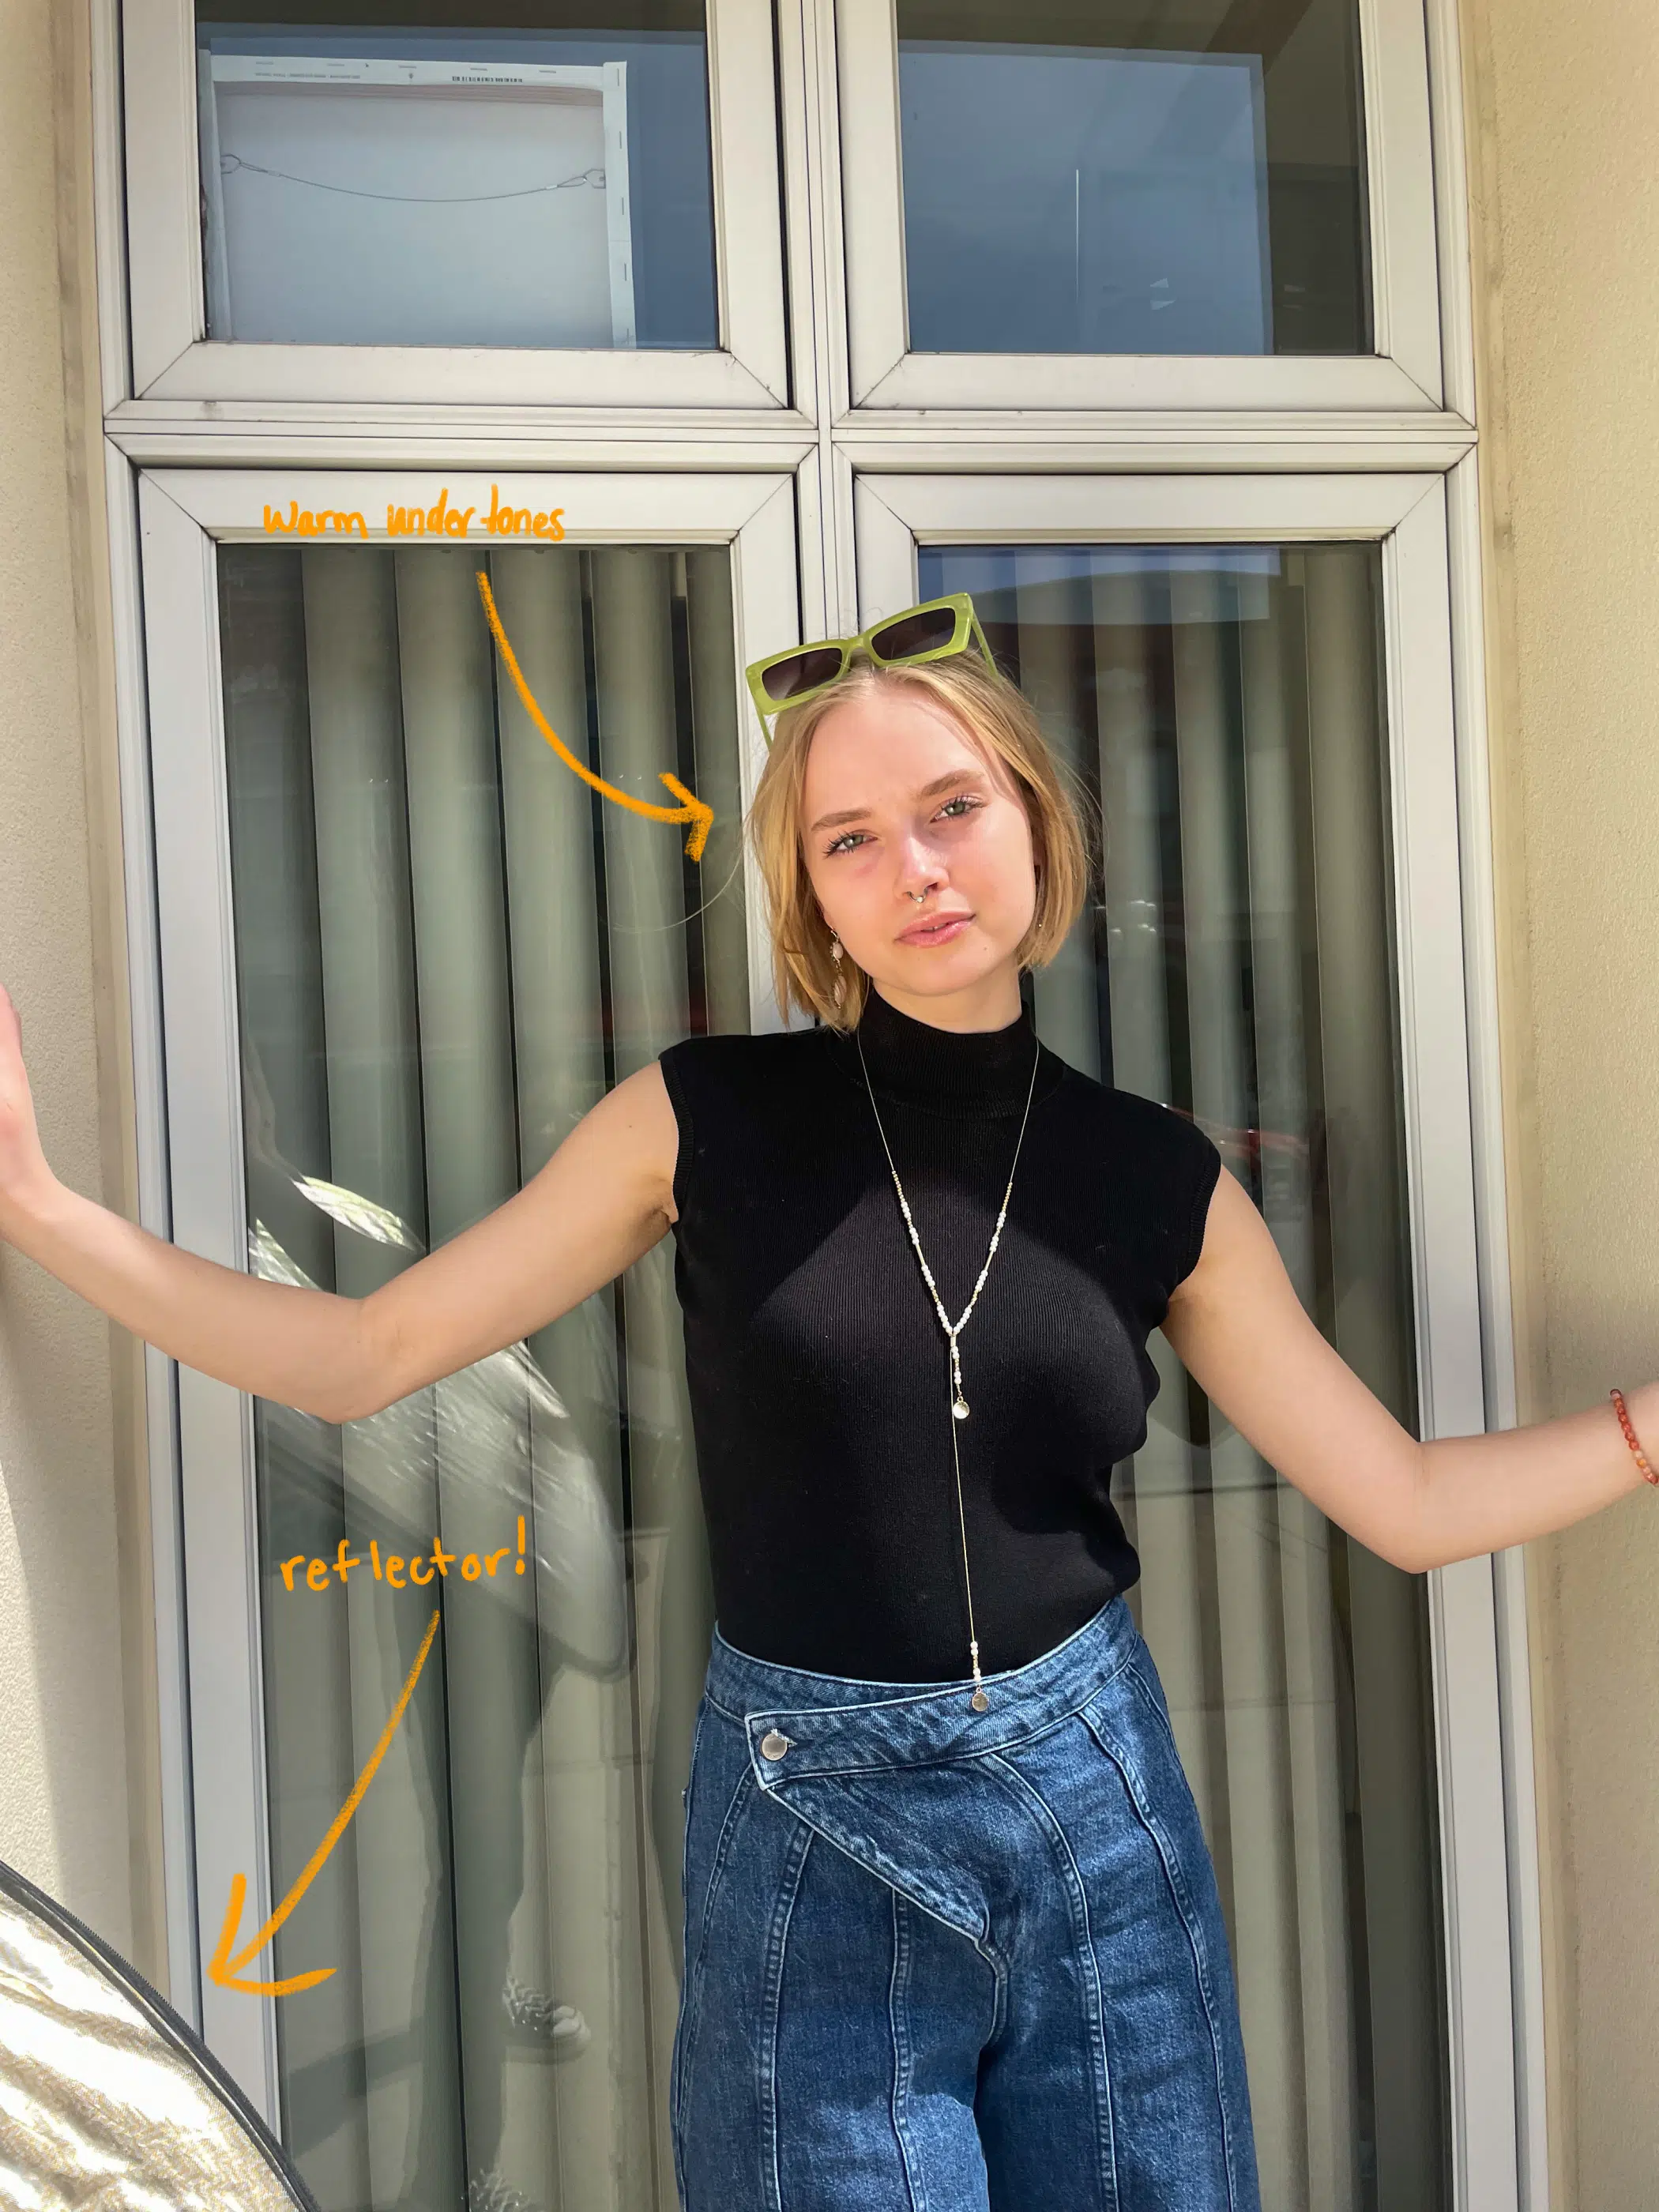
Do take advantage of the way light can bounce. Use items like white poster boards to bounce light onto your subject. This is another way to provide an indirect light source.
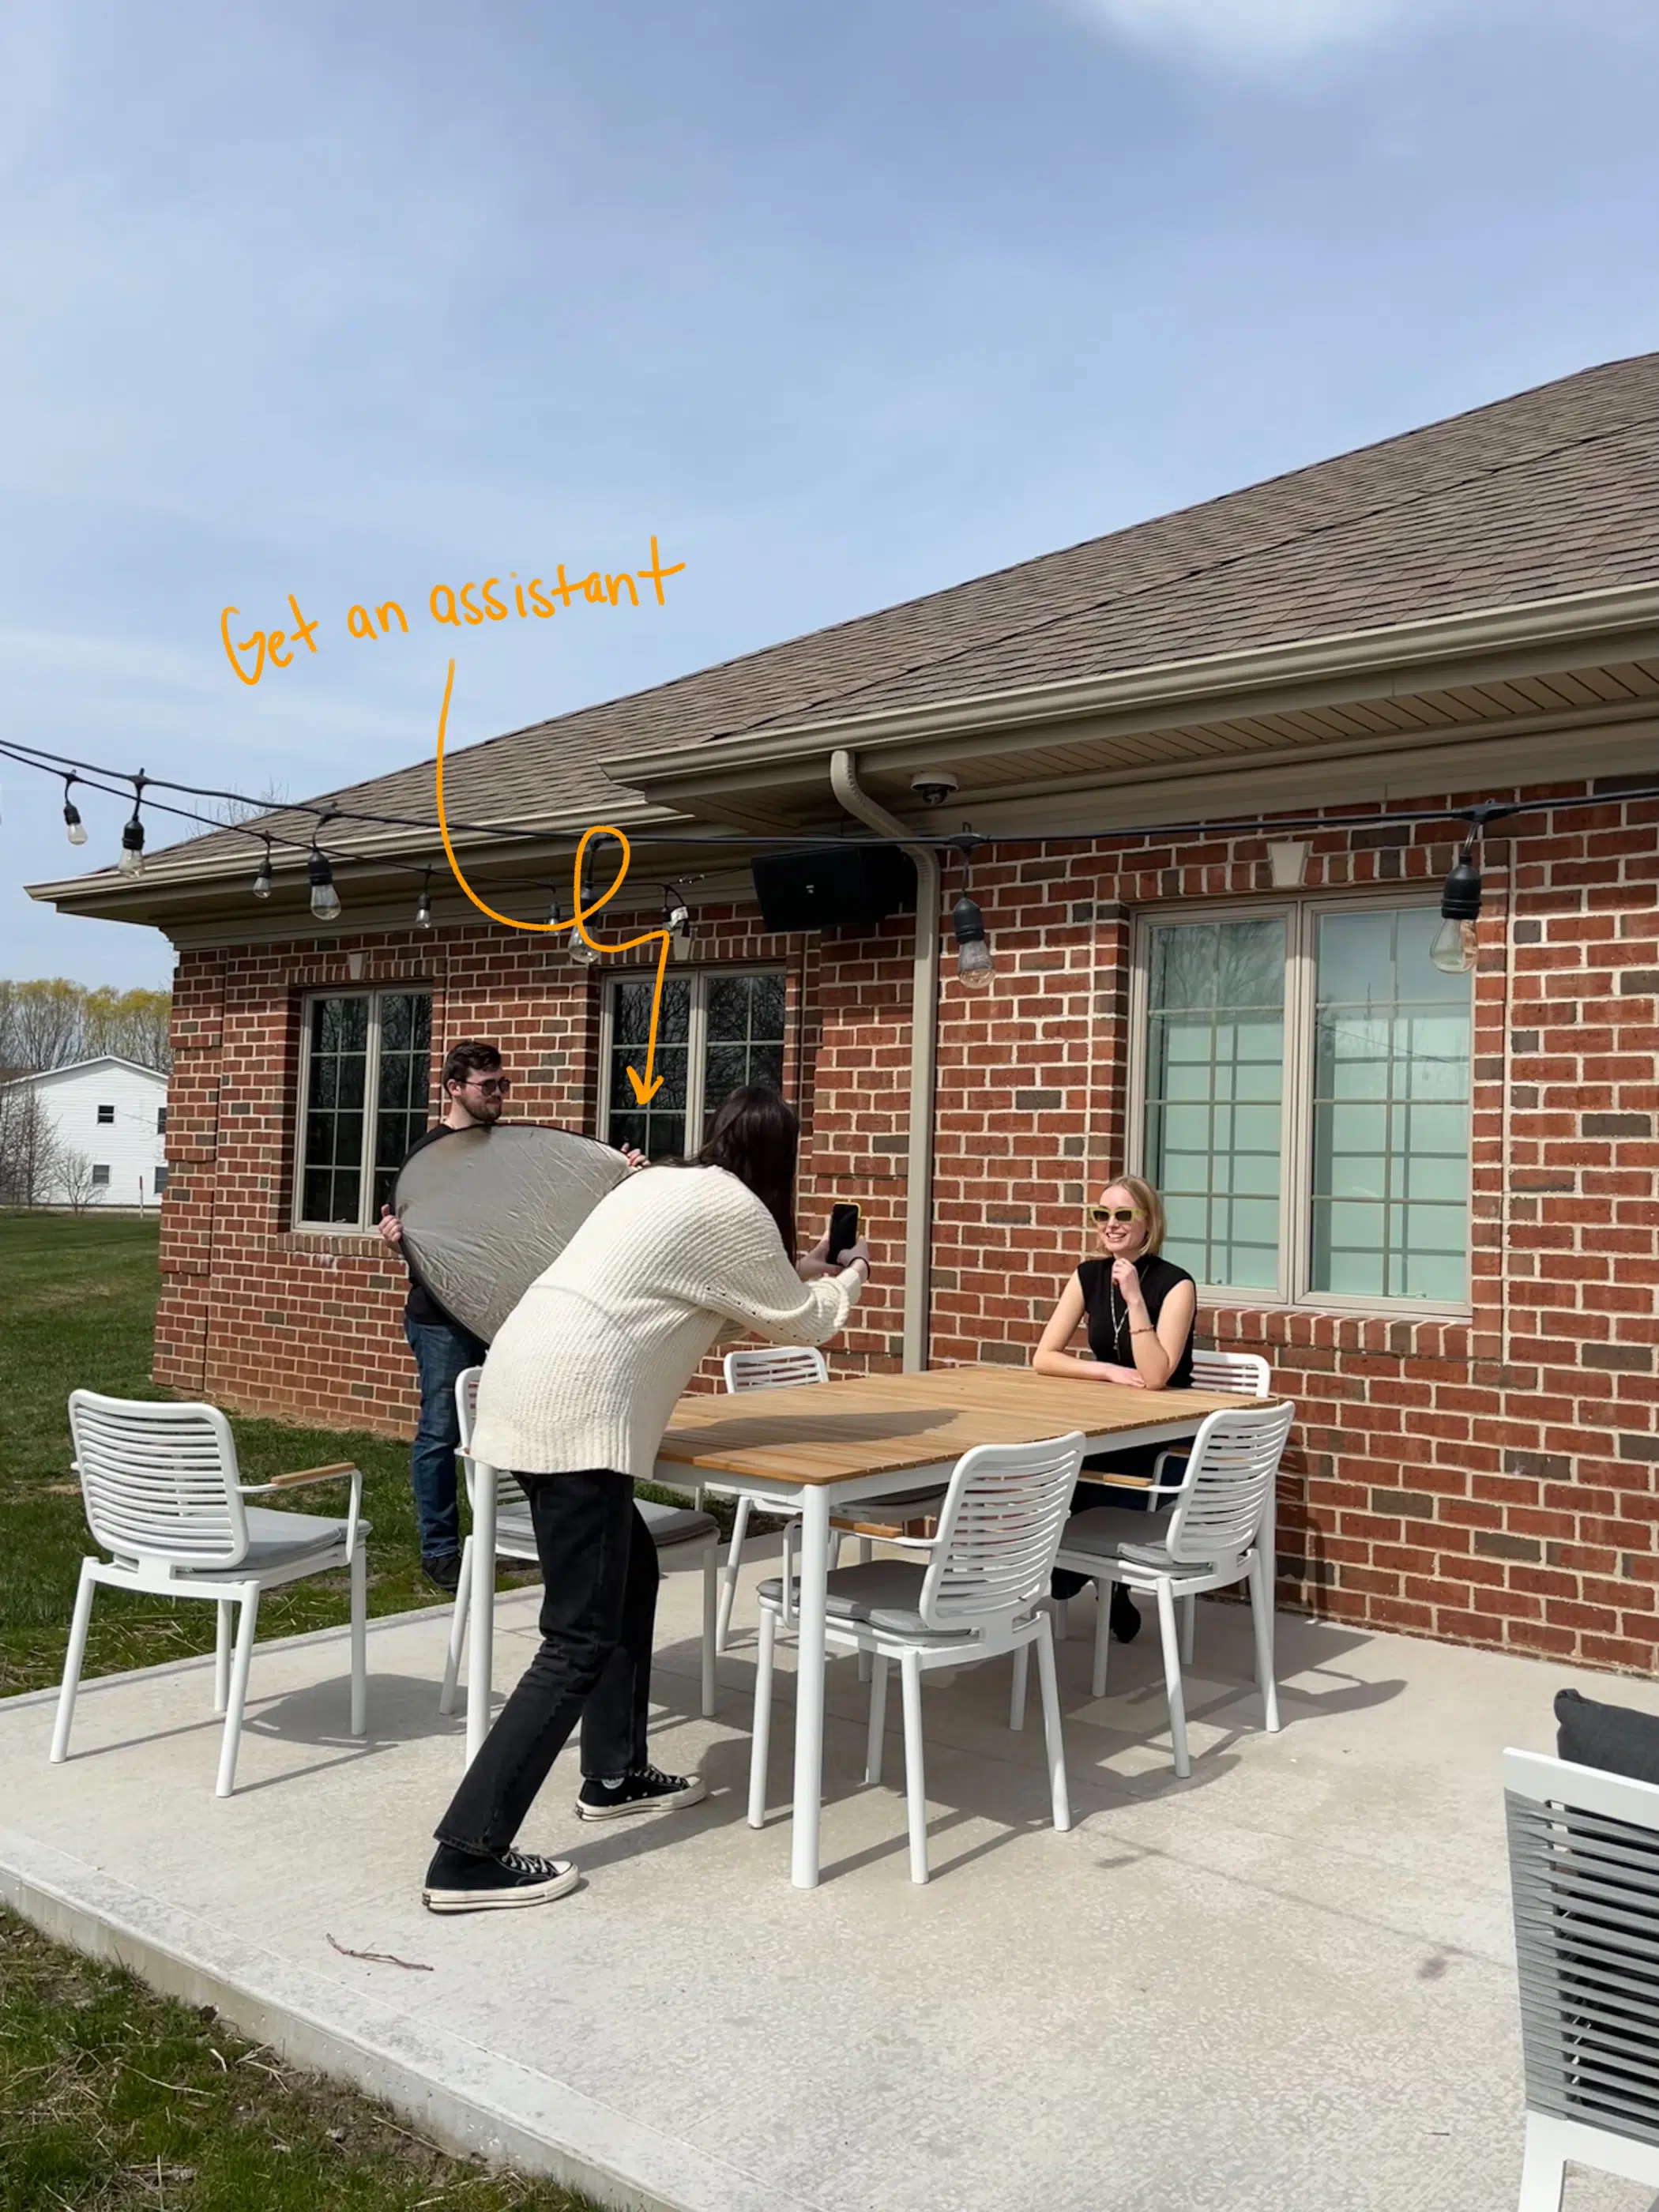
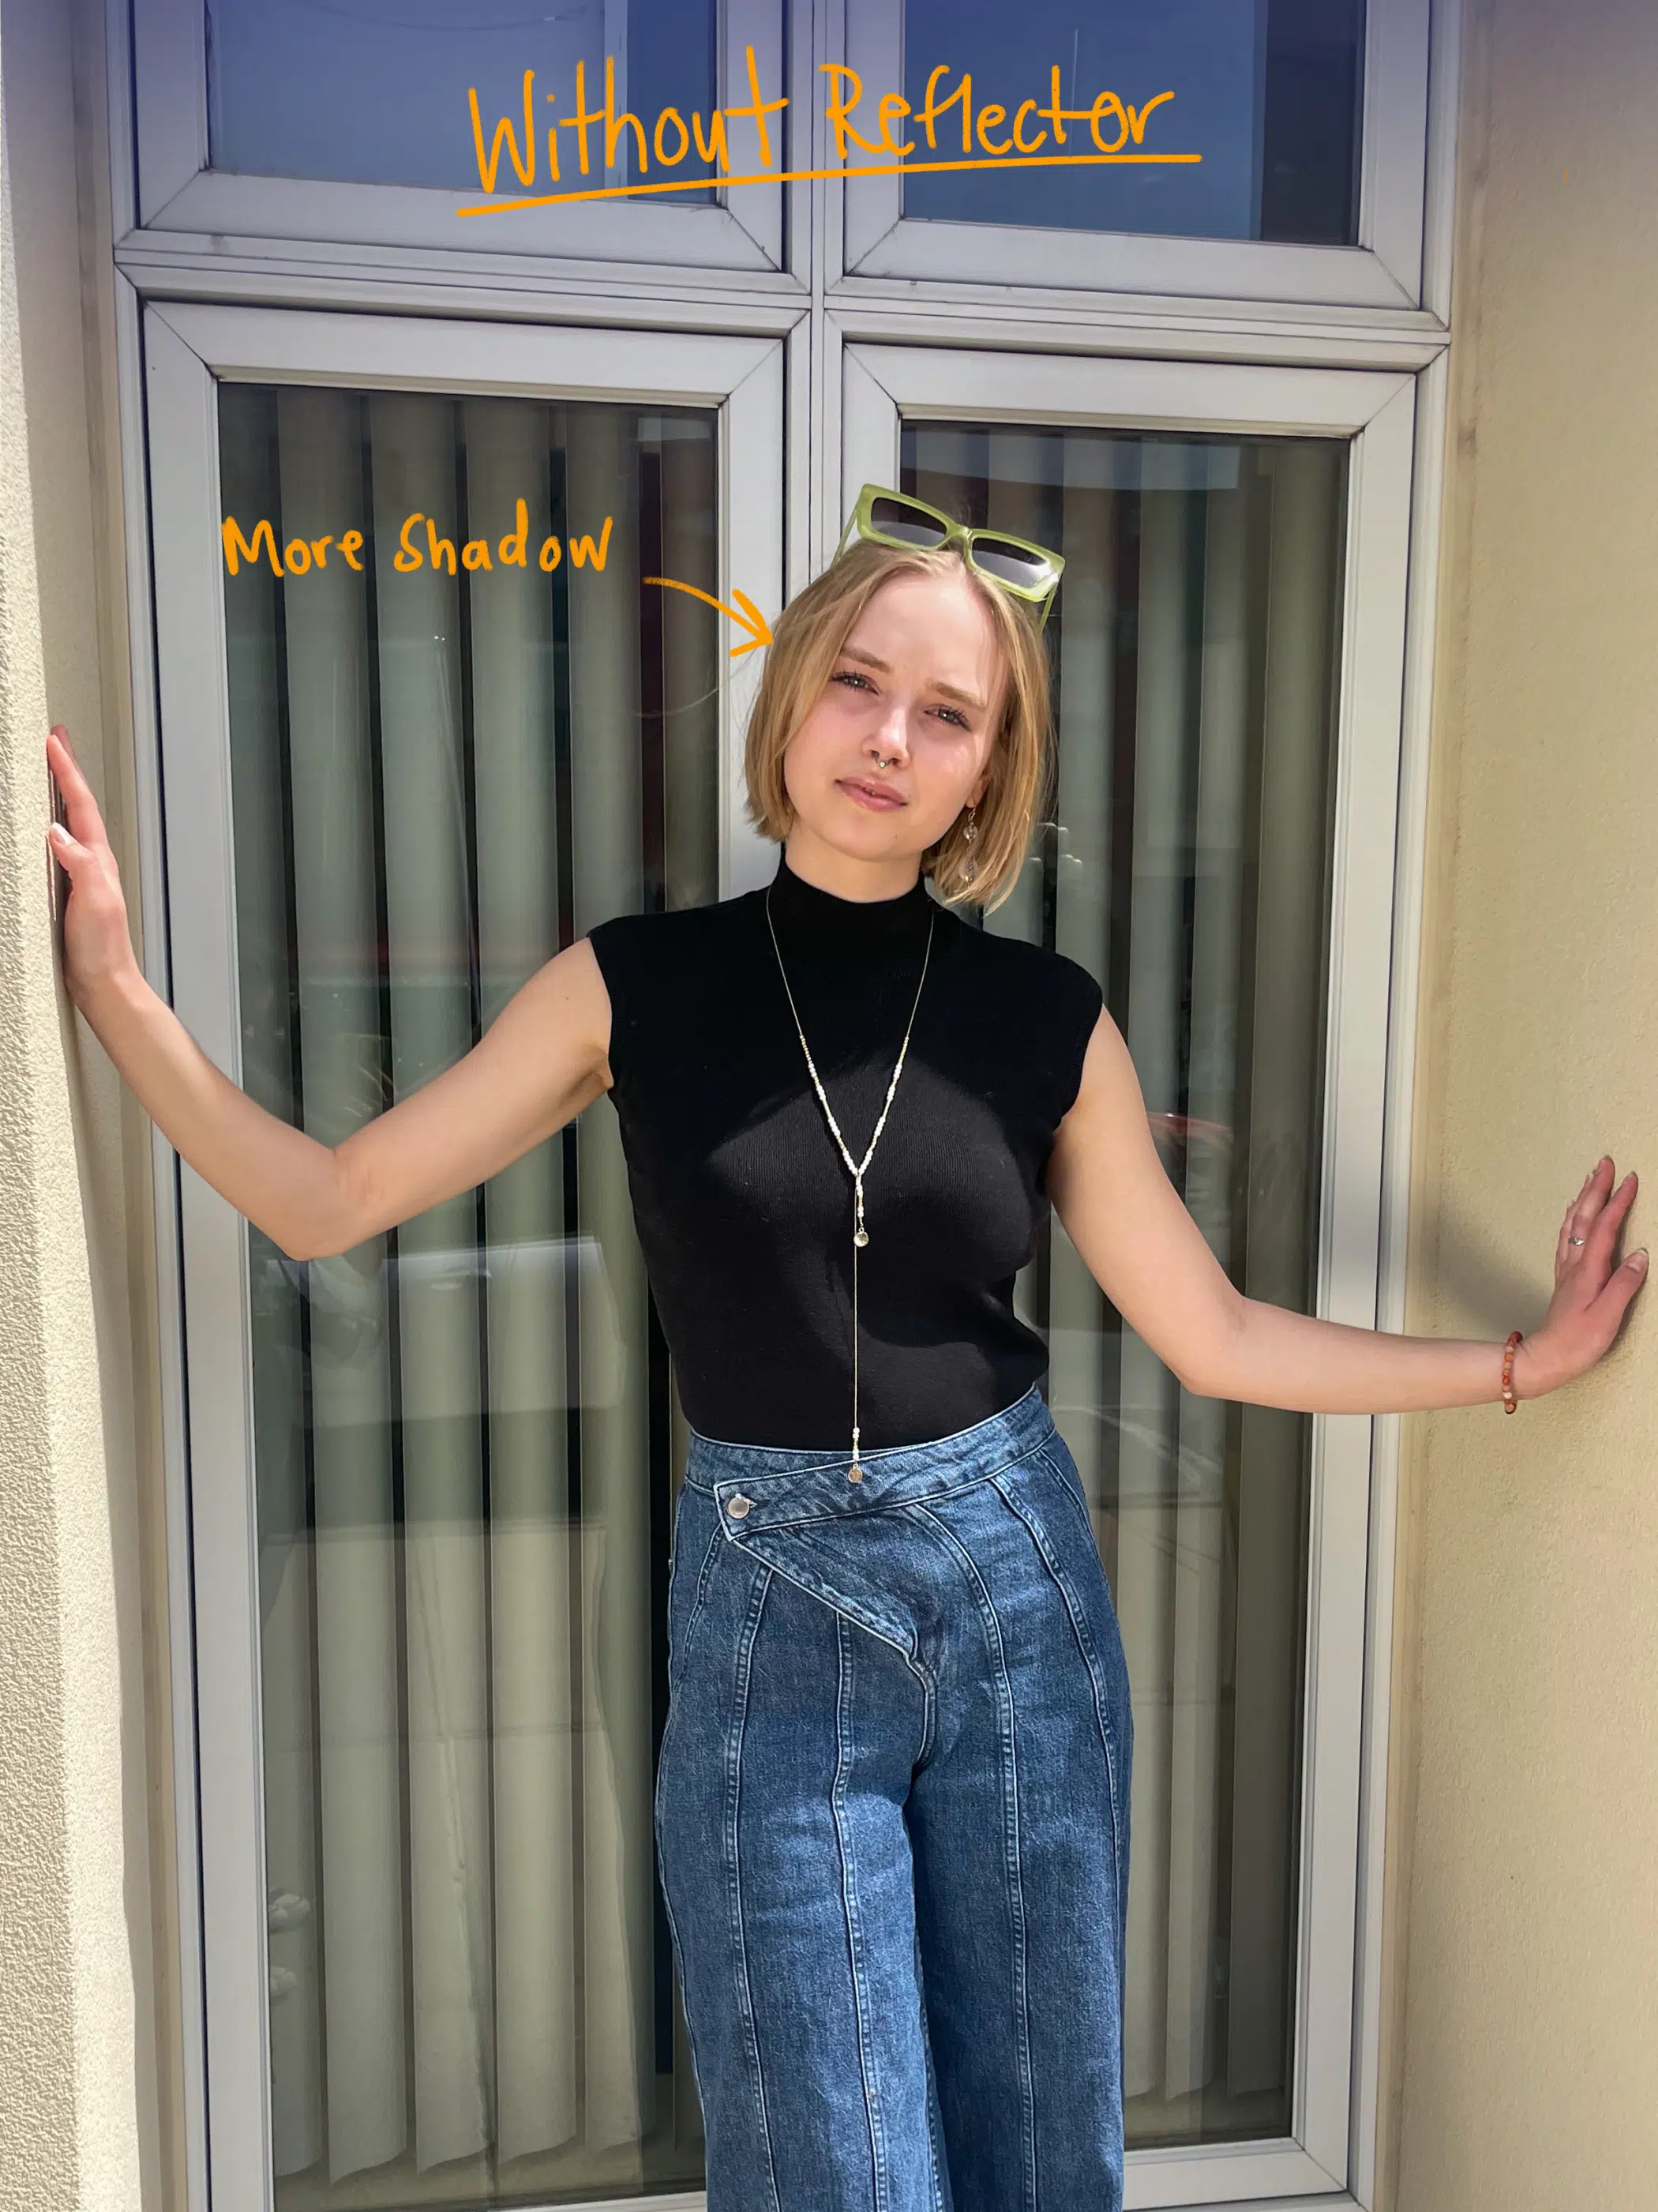
Optional: Use reflectors to bounce light and bring in warm and cool undertones.
Optional: To create a stylized image with harsh shadows, use direct light.
Optional: Use flash to create stylized, harsh shadows. (But generally, you don’t need it if you use your light sources well.)
#4 Know Your Angles
One thing non-photographers often don’t consider is the angle of their shot. Have you ever seen a photographer crouched in a seemingly awkward position with their camera?! It’s all about getting that perfect angle. How you angle your shots will make your images stand out and can completely change the look of your subject!
There are a couple of ways to get the right angle, depending on the shot you’re trying to capture.
Parallel: Match up your grid lines from your rule of thirds to parallel the elements in your image. For example, if there is a desk or wall in your frame, angle the camera to be parallel to them.

Low angle: If you shoot photos of people, getting a lower angle will lengthen the subject’s legs, making them appear taller. Lower angles can also convey a feeling of power.

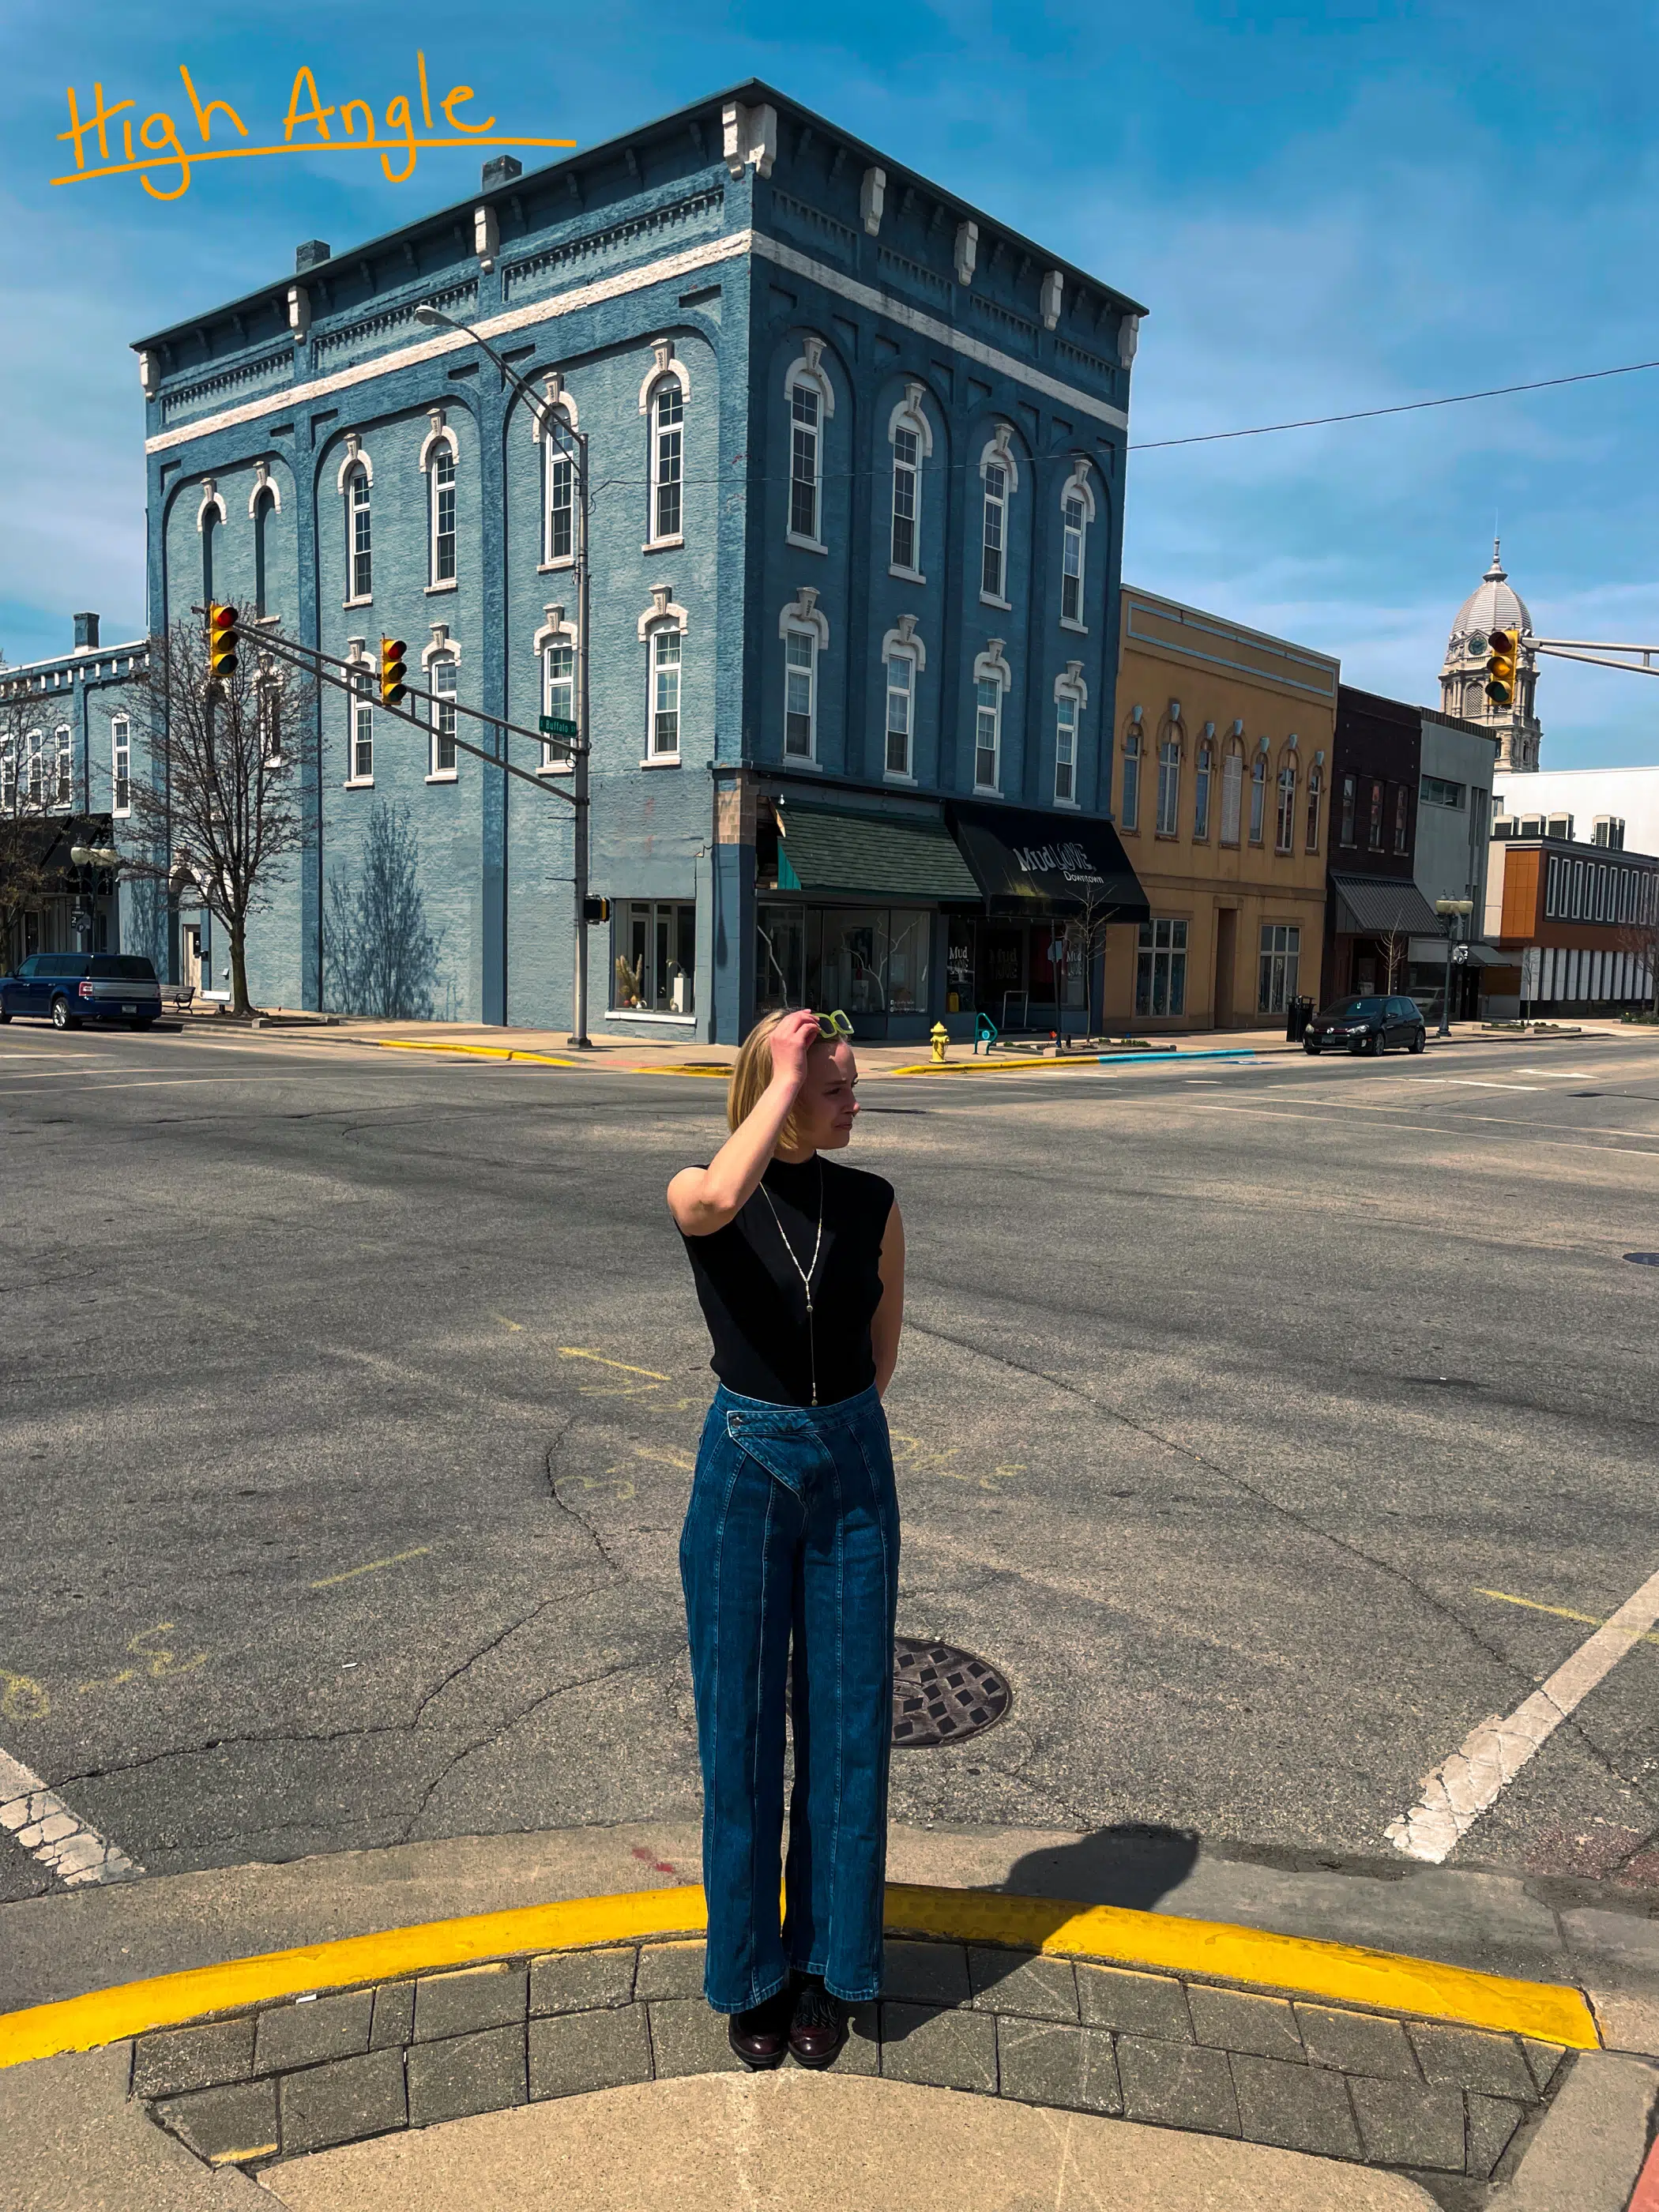
High angle: Shooting subjects from above, especially people, can make them appear less powerful. However, depending on the subject and what you want to capture, a high angle may be an easier way to help people see the subject.
Dynamic angles: Angle your subject so it’s not directly parallel to the phone to create a more dynamic look. When shooting people, have them angle their bodies to create a more flattering pose. For photos of objects, angle them to create a more dynamic and eye-catching photo.
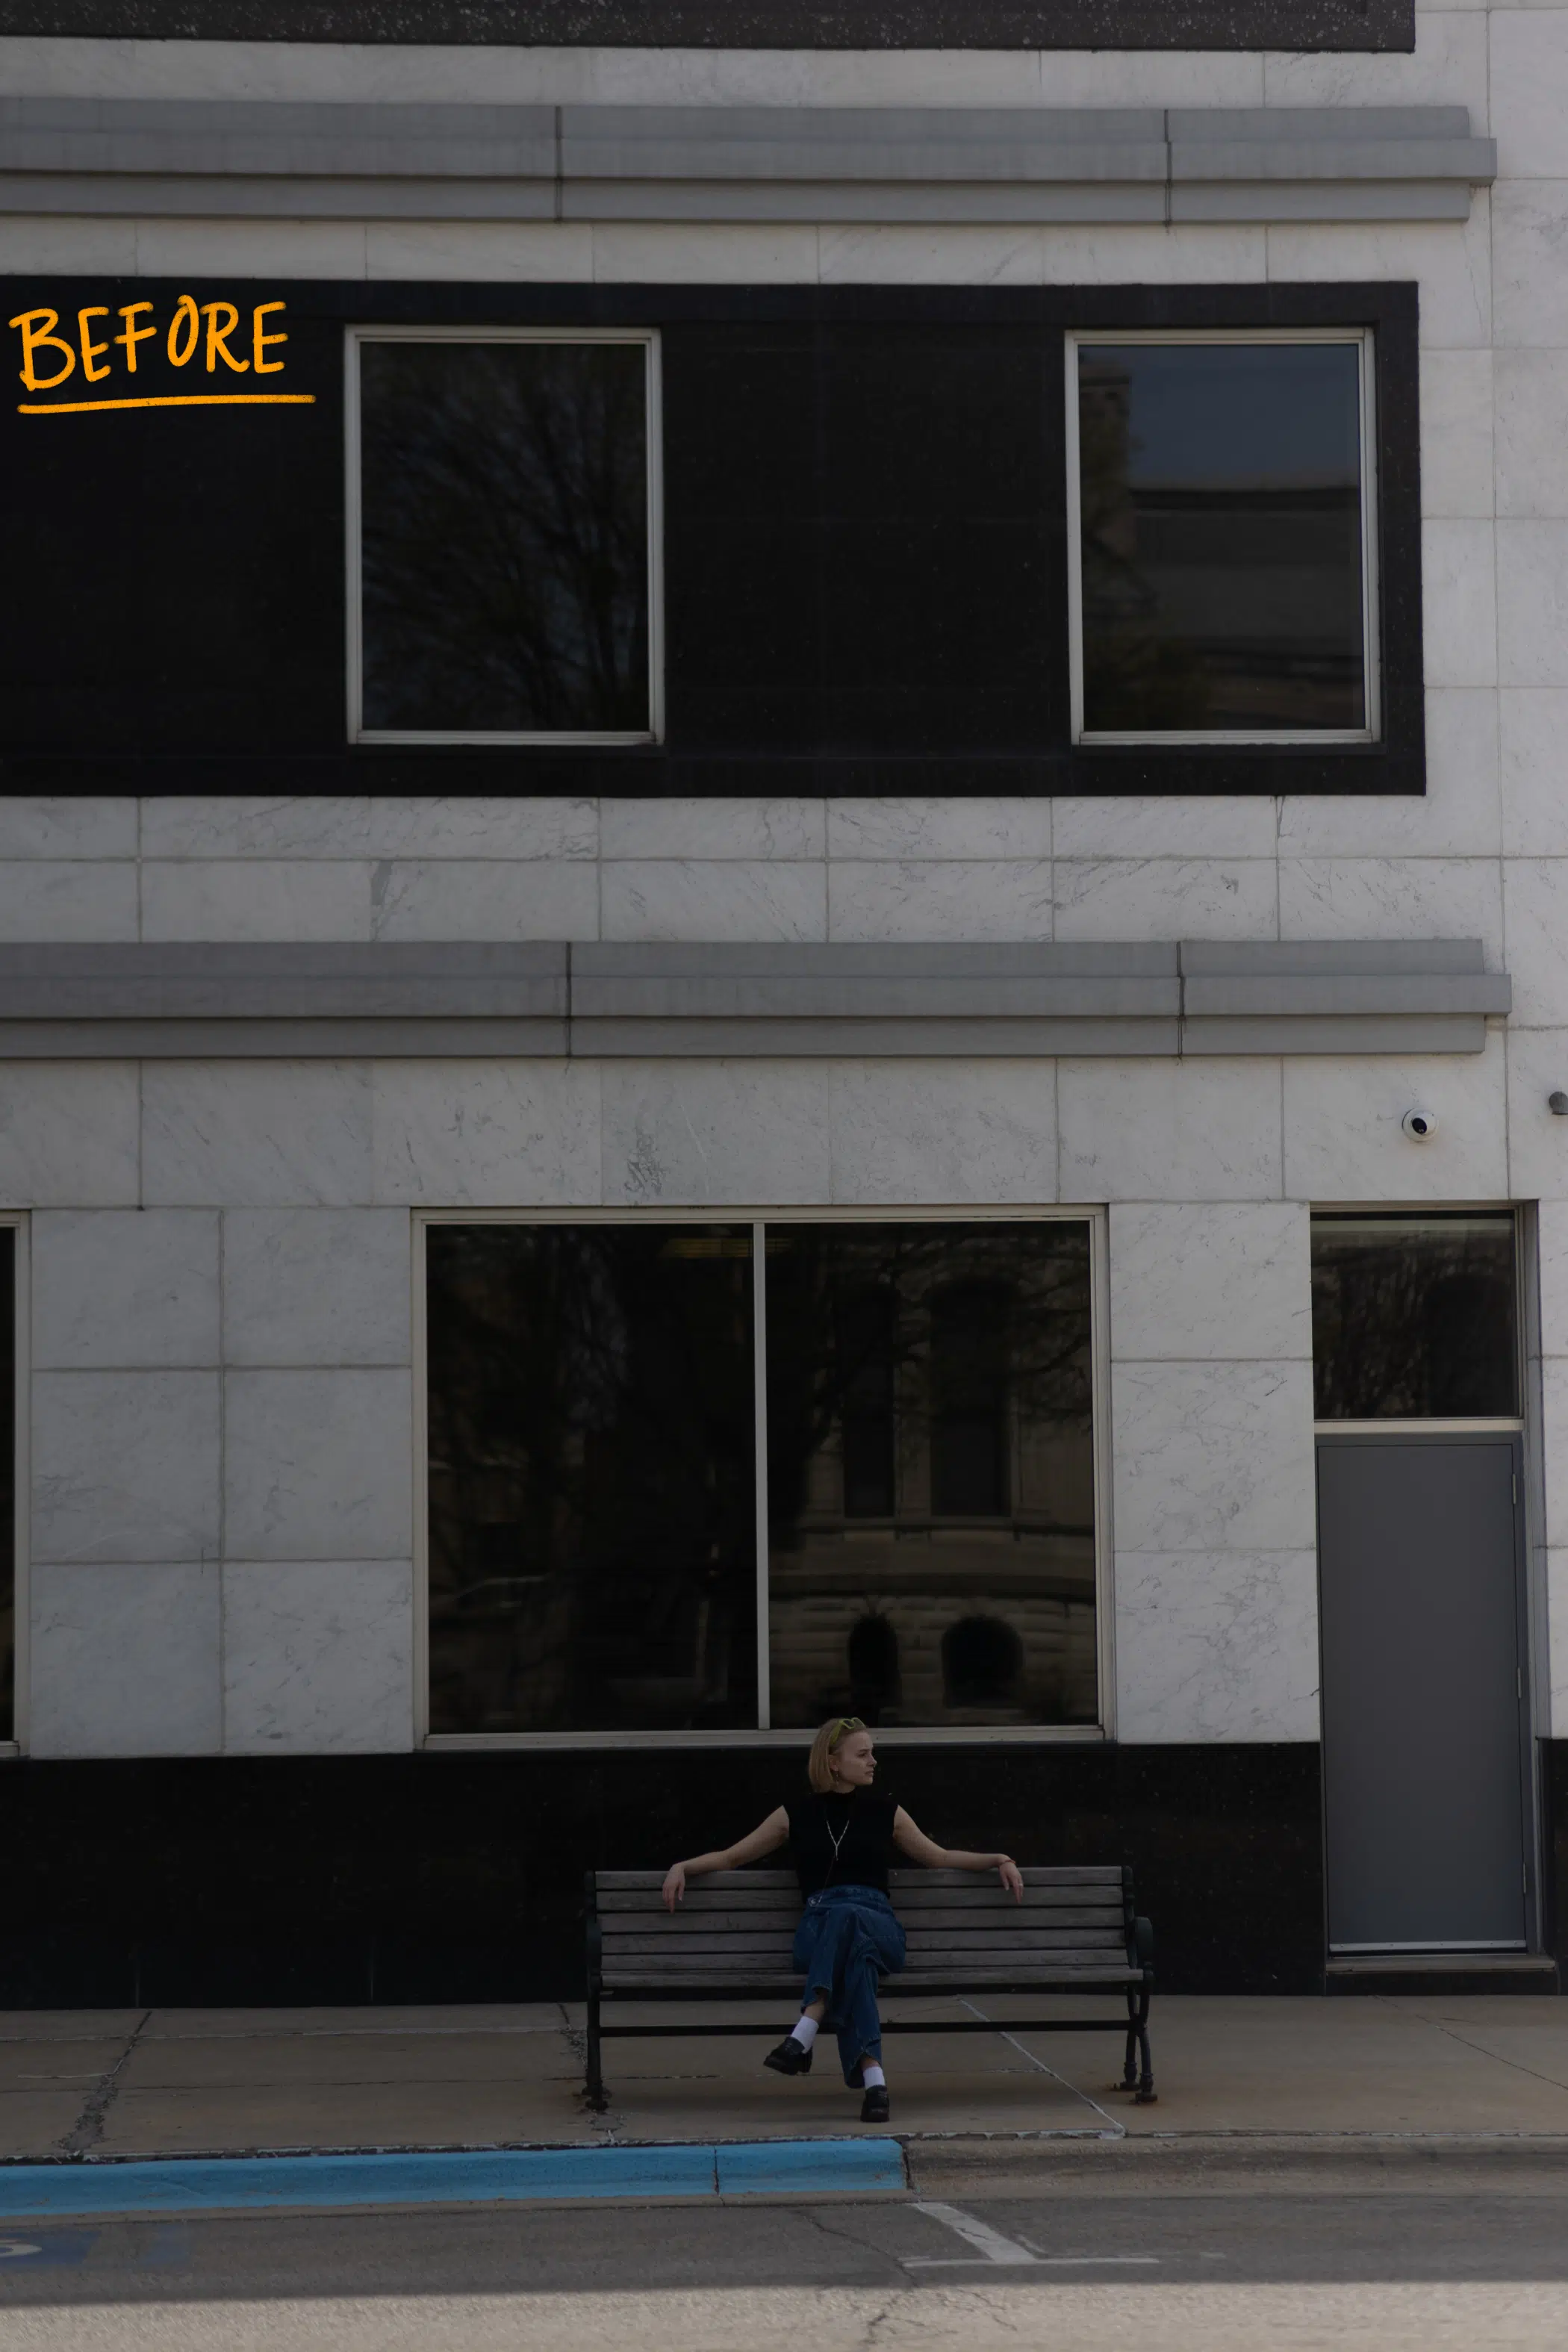
#5 Don’t Over-Edit
The editing of a photo can really make or break what you want to convey. If you use the tips above, especially around lighting, you shouldn’t have to edit your images as much as you think. Nowadays, Instagram leans more casual, so you don’t necessarily need to edit your photos, but if you’re looking to get into photo editing, we recommend Adobe Lightroom or Photoshop.
- Adobe Lightroom is free on mobile and does not require an Adobe subscription.
- VSCO is a free editing option, but if you’re looking to use some of their nicer filters, you will have to pay for a subscription.
- Adobe Express and Canva also provide free editing options for your images.
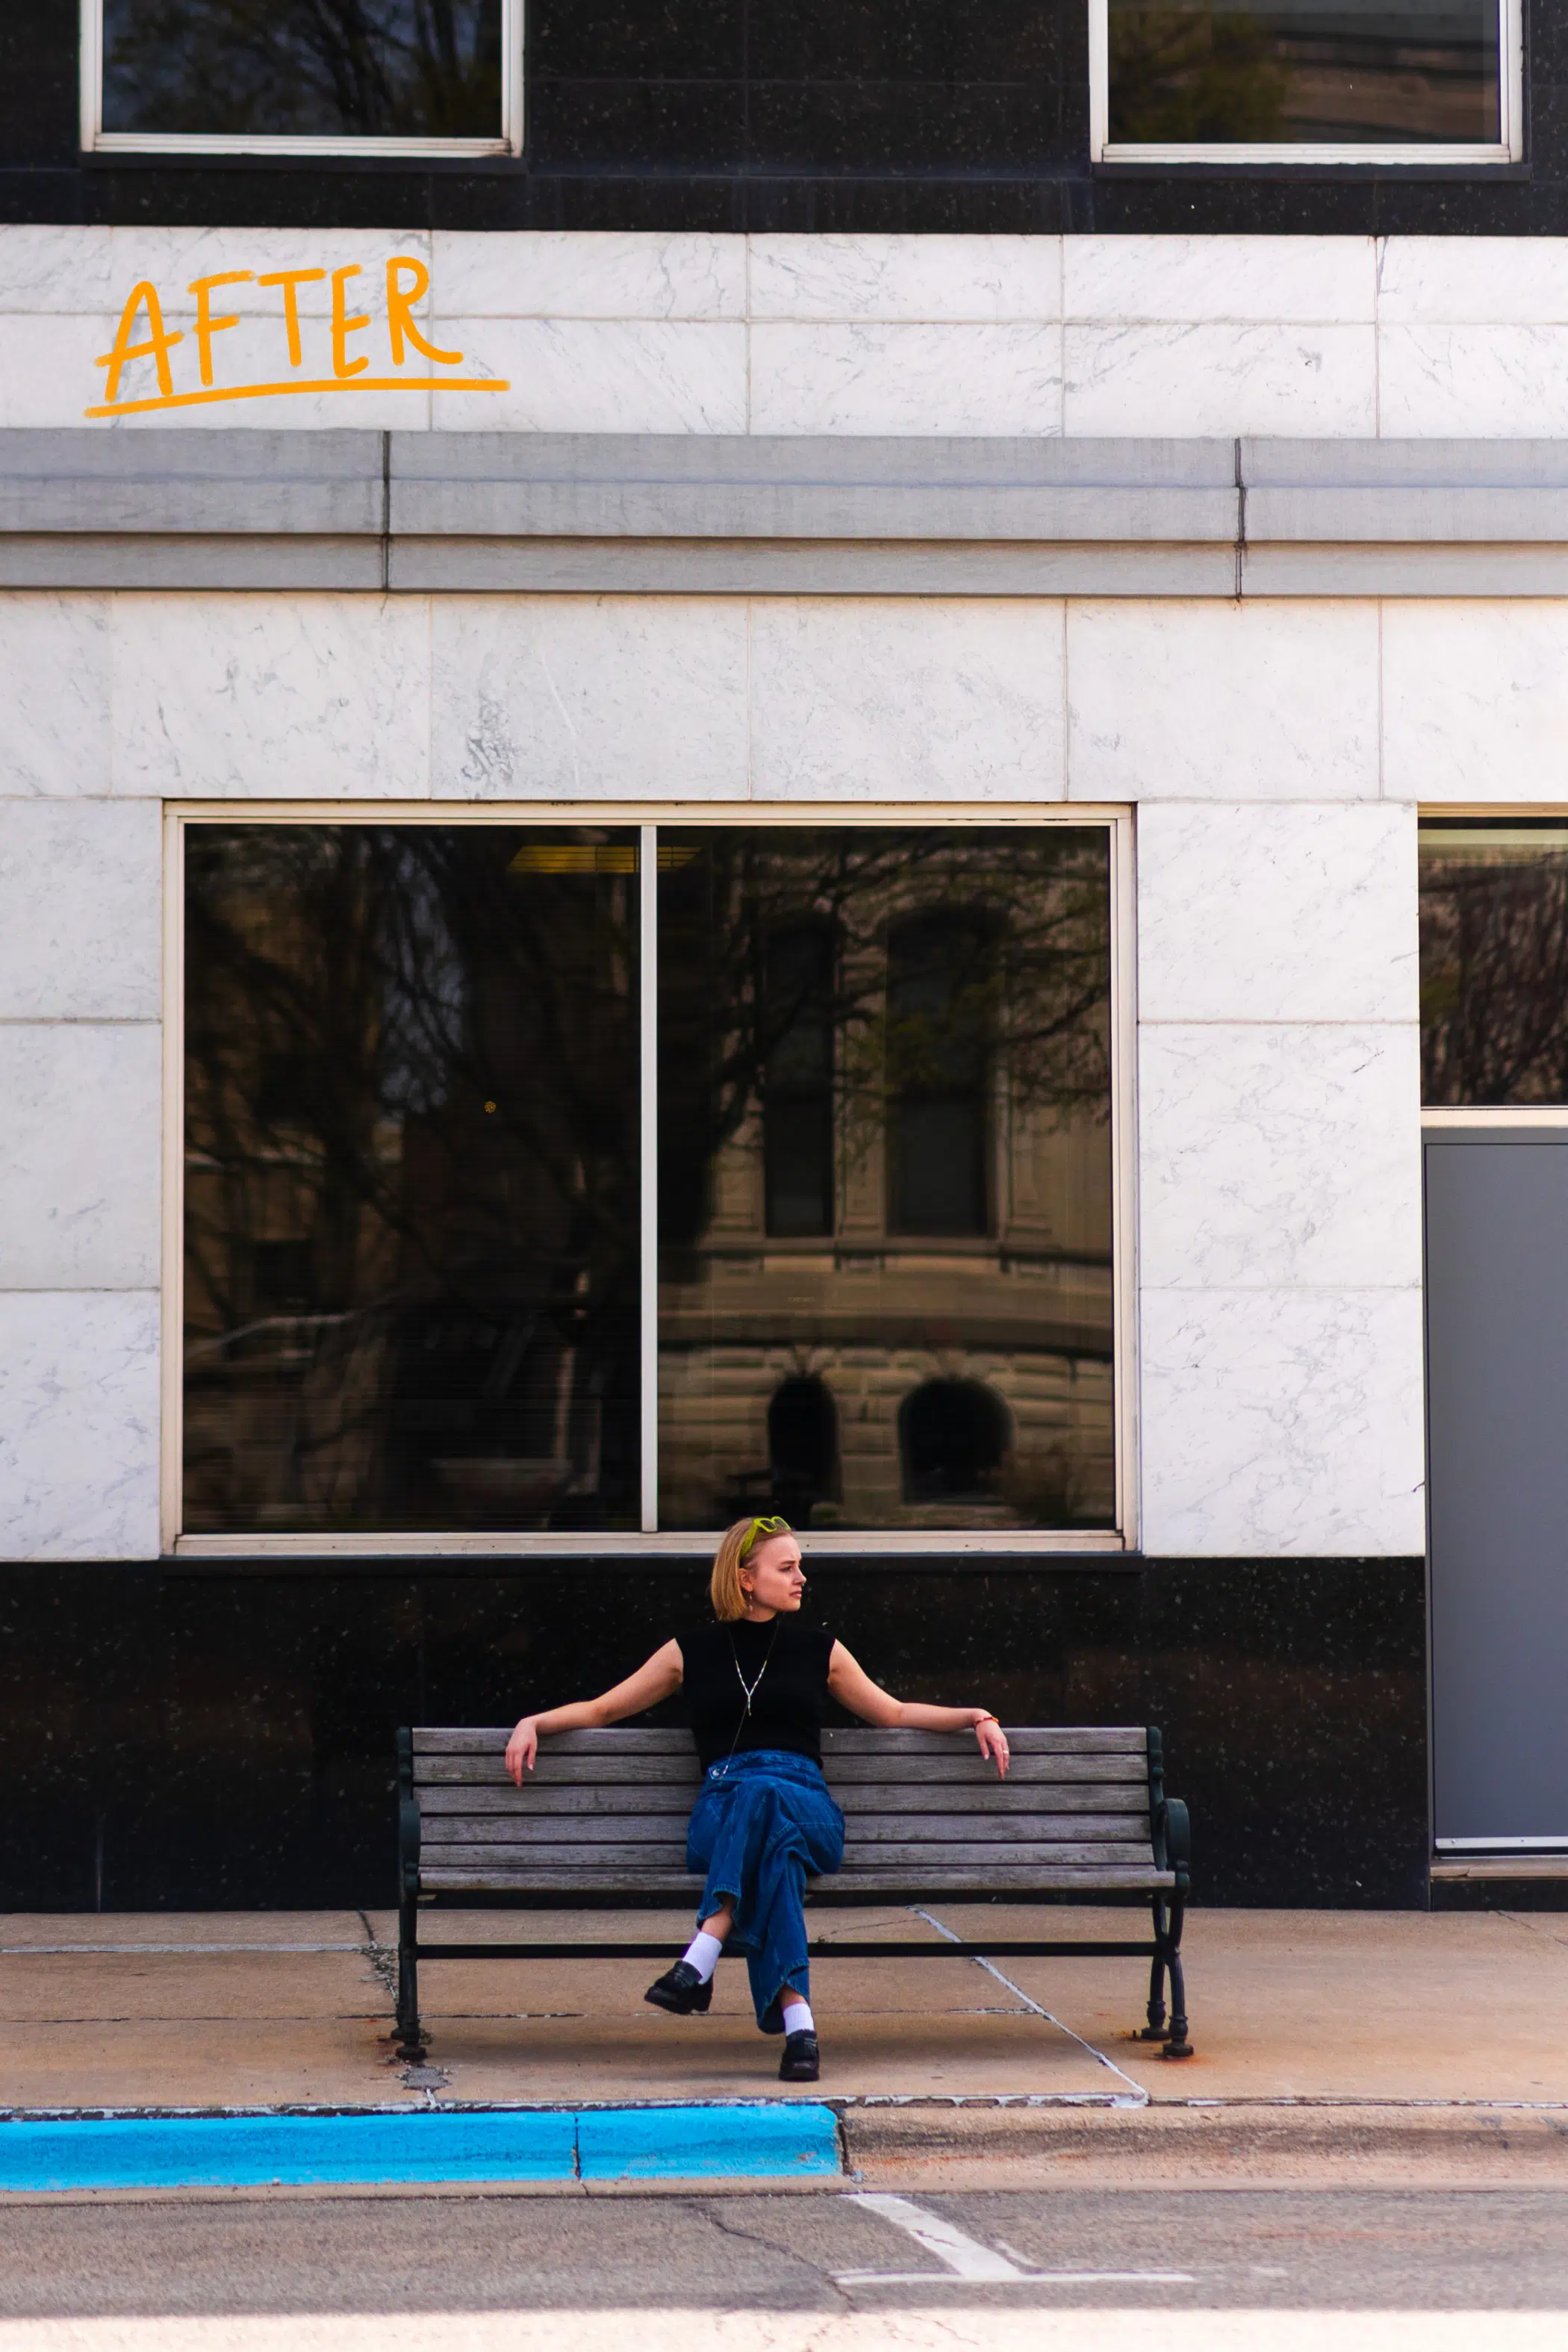
If you’re new to photo editing, a good place to start is the “auto edit” button. In Lightroom, this will attempt to balance out the exposure, highlights, and shadows of your image. You can then go from there, adjusting those elements to fit the overall aesthetic you are trying to achieve.
Pro Tip: Be careful, auto edit doesn’t always work, and you may have to manually adjust exposure, highlights, and shadows. If you want to go more in-depth in your editing, try messing around with the hue and saturation of individual colors—you can do this in the Color Mixer panel in Lightroom.
Though you don’t need to do much more to enhance your images, you may want to edit to stylize your images to your preference a bit more. Learn what you like and don’t like by exploring photography on Pinterest, and pinning what stands out. Then challenge yourself to re-create some of the editing styles you see!
#6 Utilize Your Smartphone’s HDR Feature
HDR (High Dynamic Range) consists of blending two frames of an image to get the best overall photo. HDR is great for landscape photos and helps balance the lightest and darkest tones in an image by taking photos in rapid succession and blending the highlights and shadows.
Where do you find HDR on your phone? Chances are that most people have the “Smart HDR” function automatically turned on in their camera settings. When you start taking photos, it can be like shooting with the “auto edit” feature already turned on, which might work great when you’re getting started as a photographer, but you might not be capturing the best images.
If you opt to use HDR yourself, be careful about motion blur if your camera or subject is not very still. To capture a good shot using HDR, it’s best to put your camera on a stand to ensure it is steady.
To toggle HDR on and off, open the settings app, navigate to Camera, and turn “Smart HDR” off. This will add an HDR button to the top right of their camera interface, allowing you to choose when you do or do not want to use HDR.
If you’re feeling adventurous and want to try out HDR with landscapes, give it a go and notice what kind of difference you get between the automatic setting vs. the HDR setting!
Instagram Photo Takeaways
In summary, take note of these helpful tips to make your Instagram photos stand out:
- Use the rule of thirds to create the best composition.
- Check your exposure and focus with a few smartphone camera tools.
- Maximize your lighting. Remember, indirect light is best!
- Know your angles and how various angles convey different feelings.
- Don’t over-edit. If you use great lighting, angles, and composition, you’ll be on track.
- Utilize your smartphone’s HDR setting to capture landscapes with balanced light.
Connect with DreamOn Studios to support your photography needs. We’d love to meet you!
About: DreamOn Studios
You May Be Interested In:

10 Ways to Remix, Repurpose, & Reimagine Your Video
3 weeks ago by DreamOn Studios

Storyboarding Benefits, Tips & Tricks for Stand Out Videos
3 months ago by DreamOn Studios

7 Video Types: Which is Right for Your Brand and Marketing Strategy?
4 months ago by DreamOn Studios

On-Camera Interviewee Tips & Tricks
12 months ago by DreamOn Studios